안녕하세요! 이번 포스트에서는 Spring Boot와 PostgreSQL을 사용하여 React 백엔드를 구축하는 방법을 안내해드리겠습니다. 개발 환경을 설정하고 필요한 종속성을 추가하며, 데이터베이스 연결까지의 과정을 단계별로 설명하겠습니다.
개발 환경
- OS: Windows 11
- Java: 17 (OpenJDK)
- DB: PostgreSQL
1. IntelliJ에서 프로젝트 생성
IntelliJ에서 새로운 프로젝트를 생성한 후, 필요한 종속성을 추가합니다.
- Spring Boot DevTools
- Lombok
- Spring Web
- PostgreSQL Driver


2. build.gradle 파일 설정
다음은 build.gradle 파일에 필요한 종속성을 추가하는 방법입니다. 아래와 같이 설정해주세요.
plugins {
    id 'java'
    id 'org.springframework.boot' version '3.3.0'
    id 'io.spring.dependency-management' version '1.1.5'
}

group = 'com.example'
version = '0.0.1-SNAPSHOT'

java {
    toolchain {
        languageVersion = JavaLanguageVersion.of(17)
    }
}

configurations {
    compileOnly {
        extendsFrom annotationProcessor
    }
}

repositories {
    mavenCentral()
}

dependencies {
    //스프링 부트 스타터 웹/ 기본적인 라이브러리 포함
    implementation 'org.springframework.boot:spring-boot-starter-web'

    //MyBatis
    implementation 'org.mybatis.spring.boot:mybatis-spring-boot-starter:3.0.3'
    testImplementation 'org.mybatis.spring.boot:mybatis-spring-boot-starter-test:3.0.3'

    //lombok
    compileOnly 'org.projectlombok:lombok'
    annotationProcessor 'org.projectlombok:lombok'

    //개발 도구로, 개발 중에 애플리케이션을 자동으로 다시 시작하거나 재시작 없이 변경 사항을 반영하는 기능을 제공합니다.
    developmentOnly 'org.springframework.boot:spring-boot-devtools'

    //postgres db 연결
    runtimeOnly 'org.postgresql:postgresql'

    //jUnit
    testImplementation 'org.springframework.boot:spring-boot-starter-test'
    testRuntimeOnly 'org.junit.platform:junit-platform-launcher'
}

tasks.named('test') {
    useJUnitPlatform()
}
3. application.yml 파일 설정
application.properties 파일을 application.yml로 변경하고 다음 내용을 추가합니다.
#Database
spring:
  datasource:
    url: jdbc:postgresql://localhost:5432/react
    username: postgres
    password: postgres
    driver-class-name: org.postgresql.Driver
  hikari:
    minimum-idle: 5
    maximum-pool-size: 10
    idle-timeout: 30000
    pool-name: HikariCP
    max-lifetime: 600000
    connection-timeout: 30000
  jpa:
    hibernate:
      ddl-auto: update
    show-sql: true
    generate-ddl: true
    defer-datasource-initialization: true

#MyBatis
mybatis:
  type-aliases-package: com.example.reactbackend
  mapper-locations: classpath:mapper/*.xml
  configuration:
    map-underscore-to-camel-case: true
    call-setters-on-nulls: false
4. board.xml 파일 작성
resources 경로에 mapper 디렉토리를 생성하고, 그 안에 board.xml 파일을 작성합니다.

resources 경로에 mapper 를 만들고, mapper 안에 board xml 파일을 생성하고 아래 소스를 입력해줍니다.
<?xml version="1.0" encoding="UTF-8" ?>
<!DOCTYPE mapper PUBLIC "-//mybatis.org//DTD Mapper3.0//EN" "http://mybatis.org/schema/mybatis-3-mapper.dtd">

<mapper namespace="com.example.reactbackend.board.BoardMapper">
    <select id="getBoardList" resultType="com.example.reactbackend.board.BoardEntity">
        SELECT IDX
        , TITLE
        , CONTENTS
        , CREATED_BY
        , CREATED_AT
        FROM TB_BOARD
    </select>
</mapper>
5. 데이터베이스 테이블 생성 및 데이터 삽입
-- 테이블 생성
CREATE TABLE TB_BOARD (
    IDX SERIAL PRIMARY KEY,
    TITLE VARCHAR(255) NOT NULL,
    CONTENTS TEXT NOT NULL,
    CREATED_BY VARCHAR(100) NOT NULL,
    CREATED_AT TIMESTAMP NOT NULL DEFAULT CURRENT_TIMESTAMP
);

-- 데이터 삽입
INSERT INTO TB_BOARD (TITLE, CONTENTS, CREATED_BY, CREATED_AT)
VALUES
    ('First Post', 'This is the content of the first post.', 'user1', '2023-01-01 10:00:00'),
    ('Second Post', 'This is the content of the second post.', 'user2', '2023-01-02 11:00:00'),
    ('Third Post', 'This is the content of the third post.', 'user3', '2023-01-03 12:00:00'),
    ('Fourth Post', 'This is the content of the fourth post.', 'user4', '2023-01-04 13:00:00'),
    ('Fifth Post', 'This is the content of the fifth post.', 'user5', '2023-01-05 14:00:00'),
    ('Sixth Post', 'This is the content of the sixth post.', 'user1', '2023-01-06 15:00:00'),
    ('Seventh Post', 'This is the content of the seventh post.', 'user2', '2023-01-07 16:00:00'),
    ('Eighth Post', 'This is the content of the eighth post.', 'user3', '2023-01-08 17:00:00'),
    ('Ninth Post', 'This is the content of the ninth post.', 'user4', '2023-01-09 18:00:00'),
    ('Tenth Post', 'This is the content of the tenth post.', 'user5', '2023-01-10 19:00:00'),
    ('Eleventh Post', 'This is the content of the eleventh post.', 'user1', '2023-01-11 20:00:00'),
    ('Twelfth Post', 'This is the content of the twelfth post.', 'user2', '2023-01-12 21:00:00'),
    ('Thirteenth Post', 'This is the content of the thirteenth post.', 'user3', '2023-01-13 22:00:00'),
    ('Fourteenth Post', 'This is the content of the fourteenth post.', 'user4', '2023-01-14 23:00:00'),
    ('Fifteenth Post', 'This is the content of the fifteenth post.', 'user5', '2023-01-15 09:00:00');
6. BoardEntity 클래스 생성
com.example.reactbackend.board 패키지에 BoardEntity 클래스를 생성합니다.
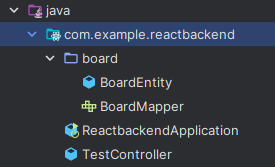
해당경로
com.example.reactbackend.board;여기에 BoardEntity를 만들어주세요!
package com.example.reactbackend.board;

import lombok.Data;

import java.util.Date;

@Data
public class BoardEntity {

    private Long idx;
    private String title;
    private String contents;
    private String createdBy;
    private Date createdAt;
}
7. BoardMapper 인터페이스 생성
com.example.reactbackend.board 패키지에 BoardMapper 인터페이스를 생성합니다.
package com.example.reactbackend.board;

import org.apache.ibatis.annotations.Mapper;

import java.util.List;

@Mapper
public interface BoardMapper {

    List<BoardEntity> getBoardList();
}
8. TestController 생성
com.example.reactbackend 패키지에 TestController 클래스를 생성합니다.
package com.example.reactbackend;
import com.example.reactbackend.board.BoardEntity;
import com.example.reactbackend.board.BoardMapper;
import lombok.extern.slf4j.Slf4j;
import org.slf4j.Logger;
import org.slf4j.LoggerFactory;
import org.springframework.beans.factory.annotation.Autowired;
import org.springframework.web.bind.annotation.GetMapping;
import org.springframework.web.bind.annotation.RequestMapping;
import org.springframework.web.bind.annotation.RestController;
import java.util.HashMap;
import java.util.List;
import java.util.Map;
@RestController //전역 ResponseBody
@RequestMapping("/api")
@Slf4j
public class TestController {
private static final Logger logger = LoggerFactory.getLogger(TestController.class);
@Autowired
private BoardMapper boardMapper;
@GetMapping("/test")
public Map<String, Object> testHandler() {
logger.info("TEST RestAPI / Test 핸들러 실행");
Map<String, Object> res = new HashMap<>();
res.put("SUCCESS", true);
res.put("SUCCESS_TEXT", "Hello SpringBoot/React");
return res;
}
@GetMapping("/board")
List<BoardEntity> getBoardList() {
log.info("eeeeeeeeeeeeeeeeeeeeeeeeeeeeeeeeeeeeeeeeeeeee");
return boardMapper.getBoardList();
}
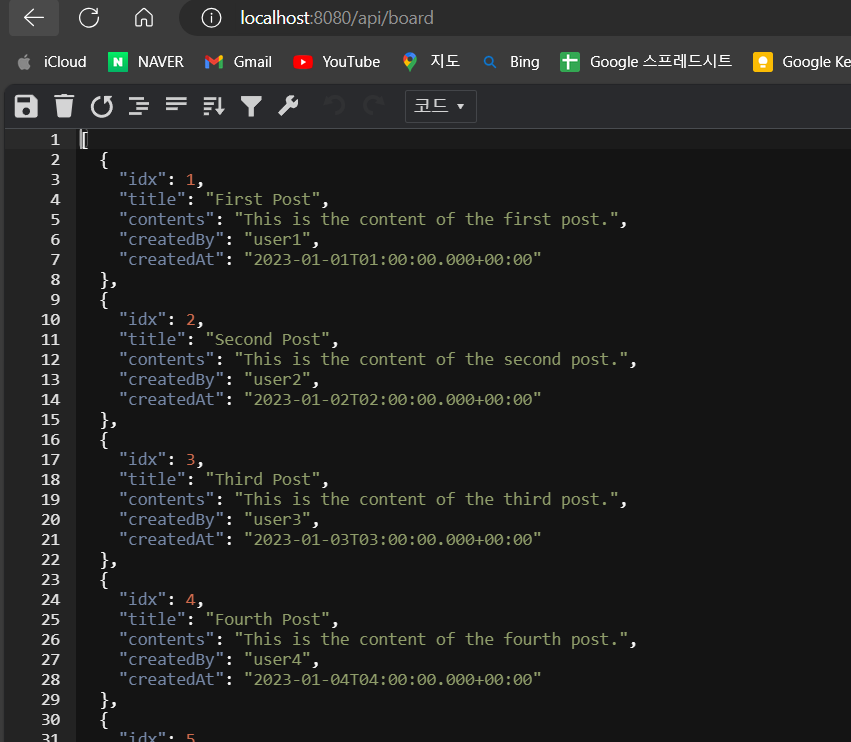
}9. 톰캣 실행
프로젝트를 실행하여 /api/test와 /api/board 엔드포인트를 확인합니다. 데이터가 올바르게 출력된다면 성공입니다!
이상으로 Spring Boot와 PostgreSQL을 이용한 React 백엔드 프로젝트 구축 방법을 설명드렸습니다. 궁금한 점이 있으시면 댓글로 남겨주세요. 감사합니다!
댓글